- Print
- DarkLight
After following along with these tasks, please complete the accompanying lesson questions on Get To Know Lesson 2 form in your system.
In this lesson, we will focus on several key tasks related to managing vendors for the "Bites & Vines" food and wine festival. We will cover how to add vendors by CSV upload, add a custom field to categorize their area of the event, search based on this custom field, set vendor fees, accredit vendors, and finally, send them the vendor contract.
1. Adding Vendors by CSV Upload: The Bites & Vines event are moving to software for the first time and as such have some existing vendors on a spreadsheet they would like in the system. To streamline the process of adding multiple vendors, we will utilize a CSV (Comma-Separated Values) file. The CSV file will contain relevant vendor information such as name, contact details, and other necessary details.
We'll import this CSV file into the event management system to create vendor profiles efficiently. Download the file above, you can open it in excel or Open Office and see it contains the contacts first and last names, company name and email address. These are the core fields to create a contact. We also are filling in some custom fields such as confirmed vendor, trading name and agreed site fee.
Let's go ahead and import this file to create the contacts in our system. Firstly you will need to log into the config account. If you do not have this level of access you will not be able to do the imports or create the custom fields in this lesson.
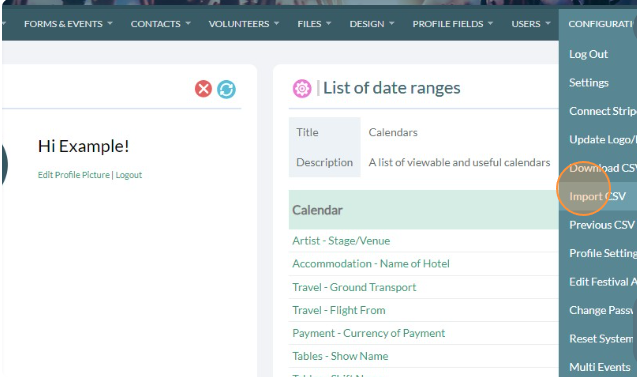
- Log into your config account and in the configuration dropdown choose Import CSV.
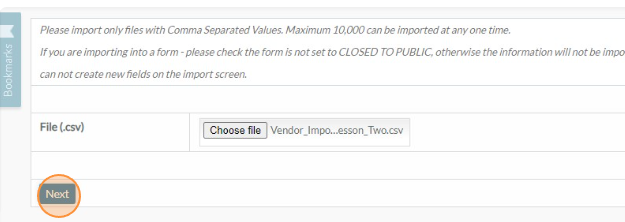
- Click the Choose File button, upload the example CSV from above and click next
- You will next get a screen which allows us to link up the fields from our CSV to the fields in our Festival Pro system. The system will do it's best to automatch these, but you should always manually check.
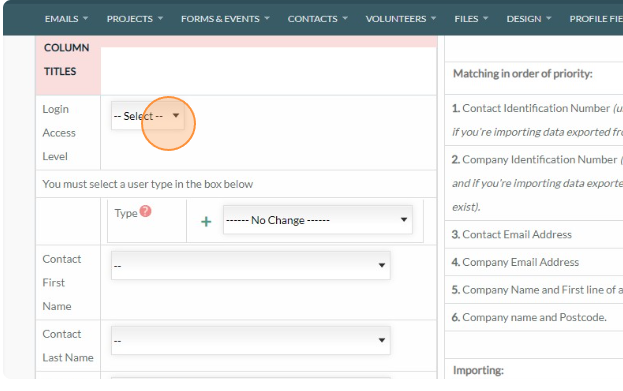
- You use the dropdowns to assign properties and link the fields together. In this case we are uploading vendors so we will want to set the login access and the user type to 'Vendor'. Next we will match up Contact First Name on our CSV with the Contact First Name field in our system. You will note that the system fields are colour coded. Blue are Contact Fields, Green are Company or Organisation fields and Orange are your profile fields.
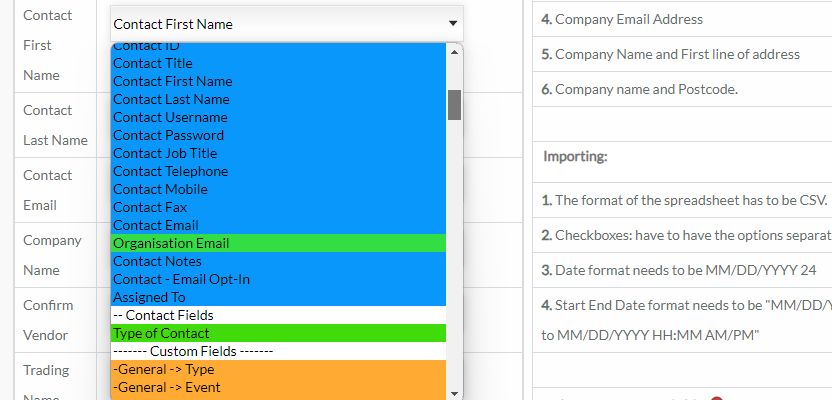
- Ensure that the contact fields for first name, last name and email address are linked, the company name is linked to the organisation name and the confirm vendor, trading name and agreed site fee are linked to the correct profile fields. Then hit Import

- If you click View you will see the companies that you have now imported. Congratulations you've just completed your first Festival Pro import. Imports are great for getting data into your system, it's always best to work from within the platform when updating data, however more advanced users do import over the top and update current data.
2. Adding a Custom Field for Area of Event: Since the "Bites & Vines" festival may have vendors from various categories like food, wine, merchandise, etc., we'll add a custom field called "Area of Event" to help categorize vendors based on their offerings. Custom fields also known as Profile fields are datapoints that you can set against any contact in the system.
This custom field will allow us to identify which area of the festival grounds each vendor will occupy. You add custom fields in your configuration log in. So it's time to log back into config if you may.
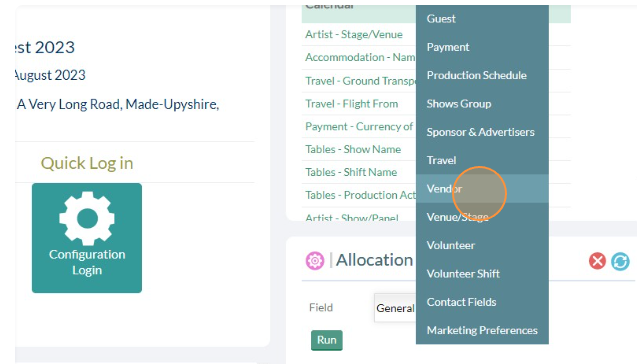
- Whilst in the configuration login, locate the Profile Field dropdown at the top and choose the Vendor Section, this is where we will add our custom field.
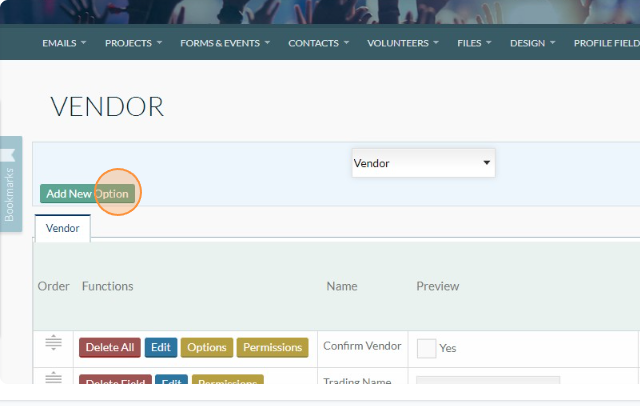
- Next we want to add a new option.
- This is going to give us a whole range of field types that we can choose to store this data in. We are going to use Single Select for this example. and add options for the vendors to be in either the Campsite or The Arena.

- Call this single select option 'Location Of Pitch' and hit the Add button to create this field. Because we chose single select we next will be given the choice to add our options. We want to add Campsite, then Arena and create the option. Use the
 icon to drag this field up above Agreed Site Fee, so it's easier to find later.
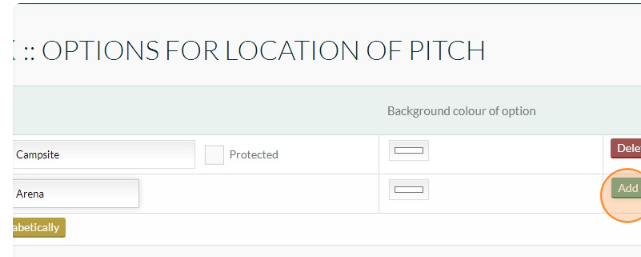
- You have now created a datapoint that can be set against any contact in the system and then in future exported, or used to filter. These custom profile fields enable you to build upon the Festival Pro defaults and create a fully bespoke system. Let's use our new field and vendors and set the locations they are going to trade in.
- Switch back to organiser view, you can either log out and back in with your organiser account, or hotswitch from your top bar

- Now we are in organiser view, let's find our three imported vendors. You could do this by going to Vendors -> View All Confirmed. But it is possible you already have a number of vendors in the system, so let's just search for them in the top corner box. This box will search for the company name
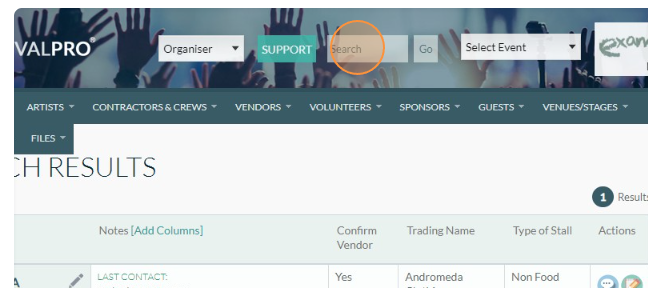
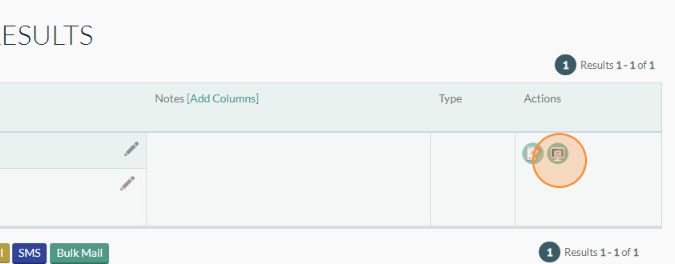
- The first name in our import was Goose Egg Heaven. Let's search for goose in this box and bring them up. You should see a monitor icon at the end allowing you to bring up the popup. In the popup you can view and edit custom fields.
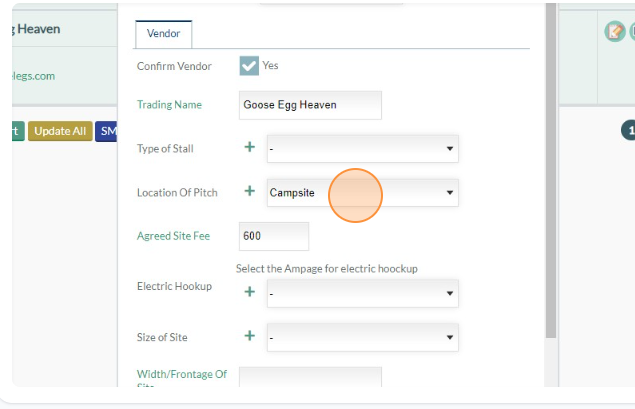
- In the popup locate the Location Of Pitch field we created earlier and in the dropdown assign this vendor the location of Campsite.
- Click save at the bottom to confirm this change to their profile field. Now repeat the process of searching and editing the fields for Piemania and Best Foodstuffs. Set Piemania for the Campsite and Best Foodstuffs to the Arena.
3. Searching based on Custom Field: Once the custom field for the area of the event is added, we can use it to search and sort vendors based on their category. For example, we can easily find all food vendors, all wine vendors, or any other specific category we have defined. Let's find our Campsite Vendors and Arena Vendors from the field we just created and set them new Agreed Site Fees.
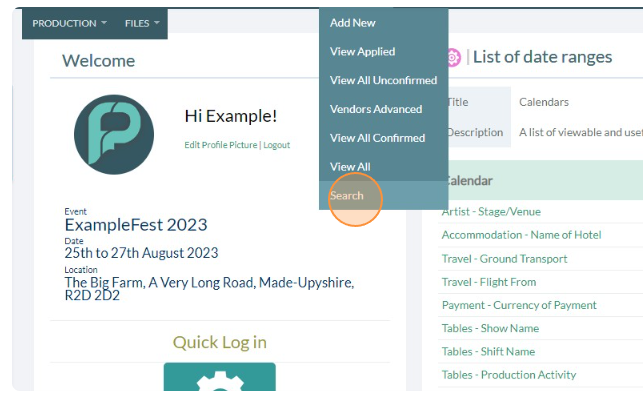
- On the main organiser menu click into the Vendor Tab and click Search
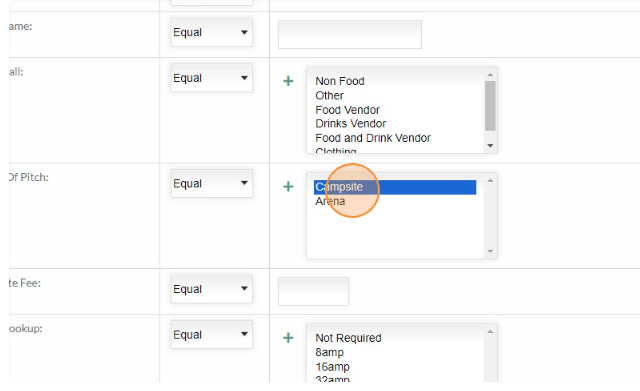
- Choose campsite from our Location of Pitch field and then hit the search button at the bottom of the page
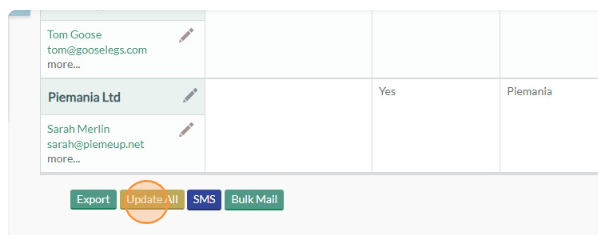
- This should display you two results, Goose Egg Heaven and Piemania, as we set them earlier to be campsite traders. We can use the Update All button to update both of their Agreed Site Fees. Click Update All
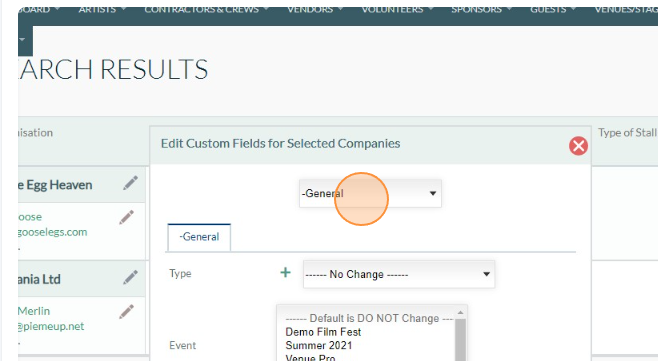
- Click This Dropdown and select the Vendor Section, where this site fee field lives.
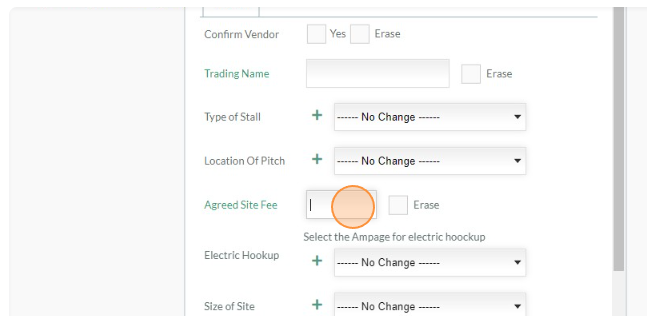
- Click into the Agreed Site Fee box and enter 500. Giving them both our campsite traders a trading fee of 500.
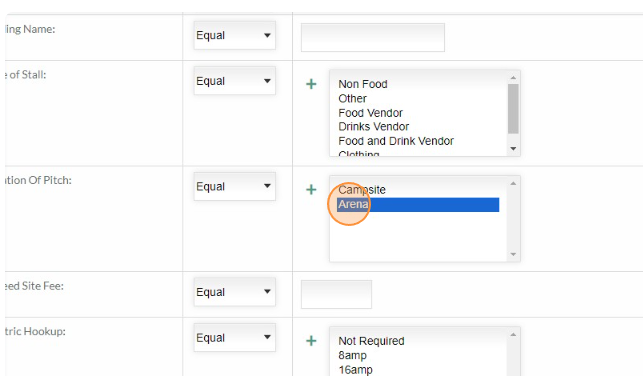
- Now let's update the Arena trader differently. Go back to Vendors>Search and this time Choose Arena
- Instead of updating via the popup, this time we will use inline editing. This feature allows you to build your own spreadsheet like view of the data and edit the fields on screen. Click Add Column and then select the Agreed Site Fee field from the Vendor Tab.
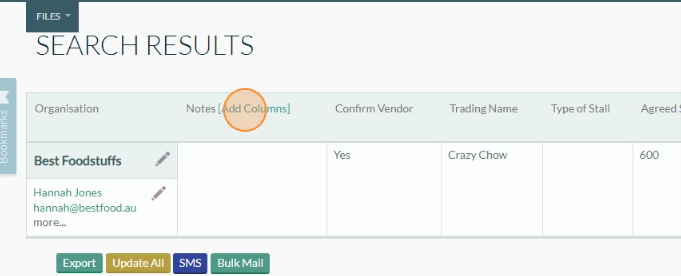
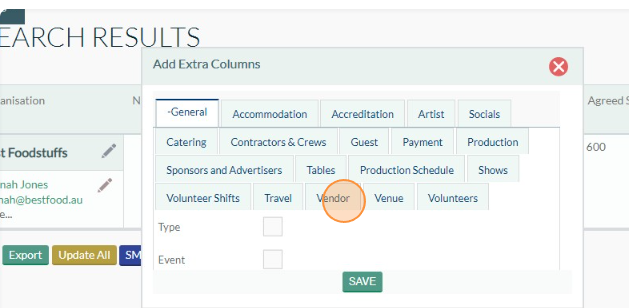
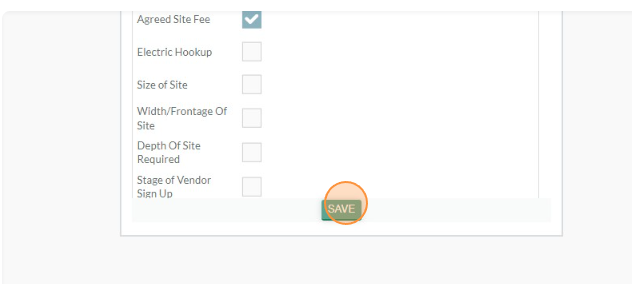
- Now you will see your selected fields presented on the search results screen. You can now see they currently have a site fee of 600. We can update this to 800 by clicking into the field, editing and then clicking away.

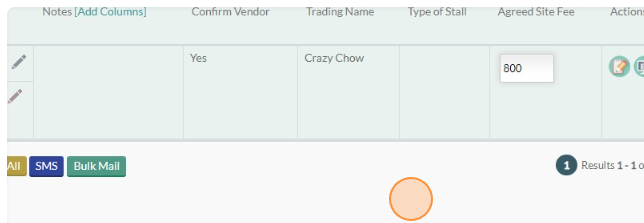
- Note, you can add columns on any form registration list or search result. but you can only edit this data inline on search result screens.
4. Setting Vendor Accreditation: To proceed with the vendor agreements for our festival, we have set vendor fees according to their placement within the festival grounds. Next we want to add the number of passes they may be accredited before we can send them a contract to pay the site fee, and give us the names and generate their tickets.
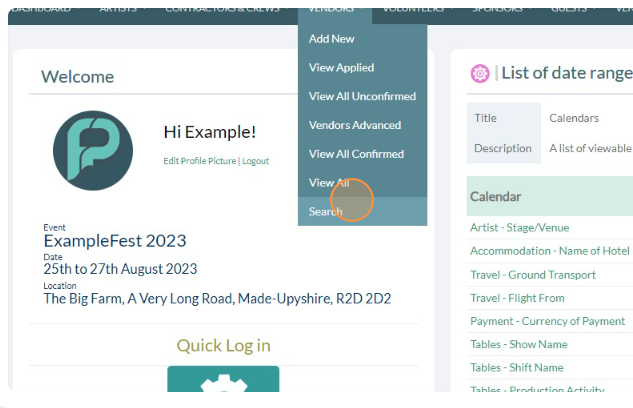
- Let's give our vendors 3 vendor passes each for them and their crew. This time we will bring up all of our vendors for the campsite and the arena together. Once again we want to run a vendor search, so go to the Vendors dropdown and search.
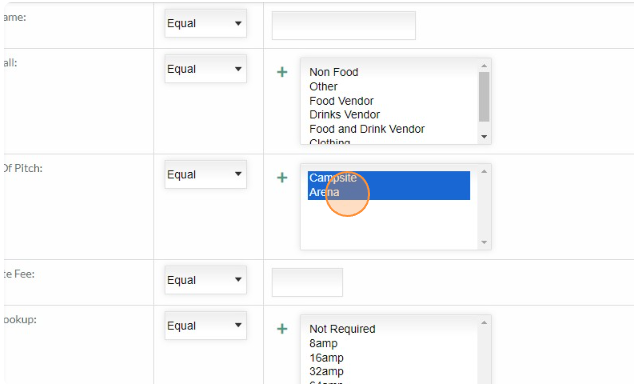
- Click on campsite and also hold down your control key, or command key and click also on arena to select both options. Then run the search.
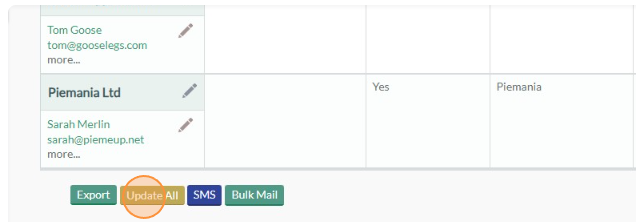
- We should be presented with the three vendors we have been working with. We can now click the update all button.
- Click the dropdown menu and choose Accreditation
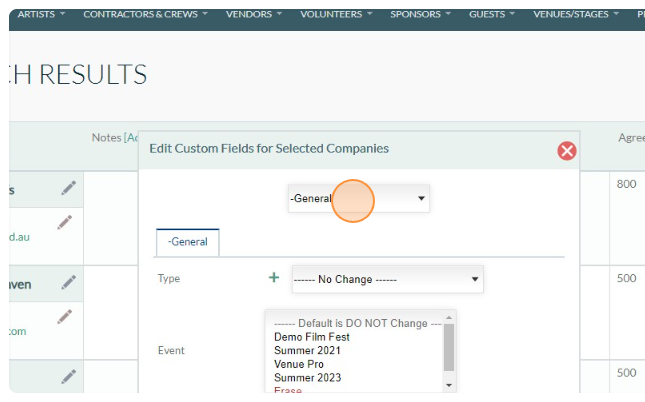
- Input the number 3 into the Vendor field in General Accreditation
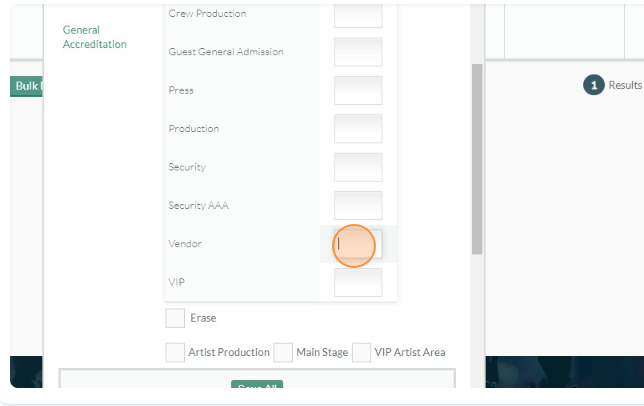
- Click save. You have just assigned each vendor three passes. This could have been accomplished per vendor via the popup window under the monitor icon, or via inline editing by adding general accreditation to the add columns list.
5. Sending Vendor Contracts: After setting the vendor fees and accrediting them, we will generate vendor contracts. These contracts will outline the terms and conditions of participation, including payment details, booth allocation, festival rules, and other essential information.
We will then send these contracts to each vendor, along with a request for their signature to formalize their participation in the "Bites & Vines" festival. We have a default template for this that you can edit at a later stage, but for now let's just send this contract to our campsite and arena vendors.
- Run the same search as earlier for Vendors who are trading in both the campsite and the arena, bringing up our three vendors we have been working with.
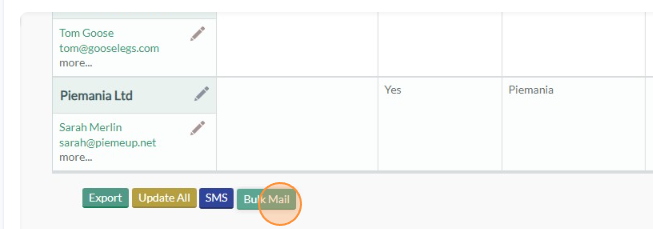
- With the three vendors showing please click onto the Bulk Email Button
- Click the Email Template dropdown
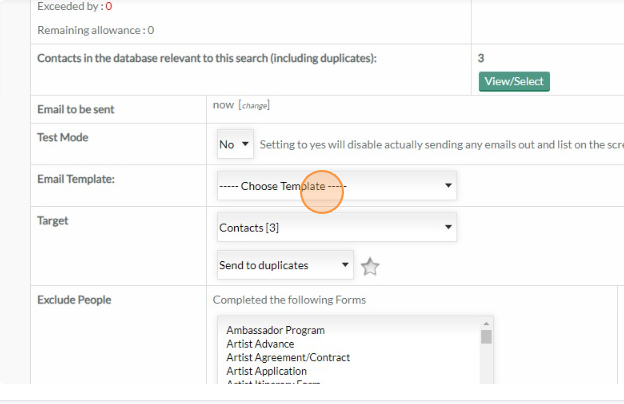
- Select the STANDARD: Vendor Contract and Advance Login

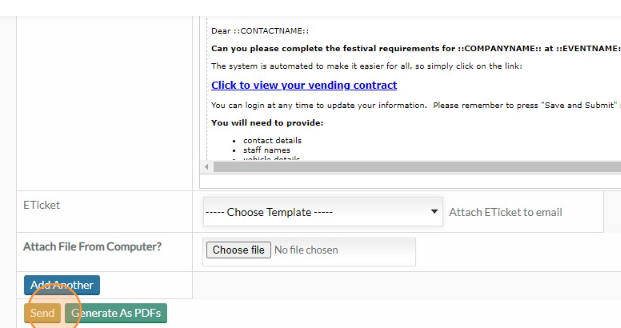
- You will see the email template come up with a link to the contract, this will be an autologin link allowing one link to be sent in a template, but each vendor will get a unique link logging them into their profile. Hit send
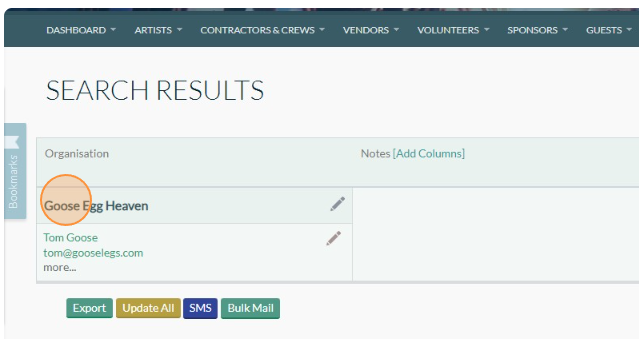
- Finally let's check that correspondence sent and view what the contract looks like for them. Run a search in the top bar for 'Goose' to bring up Goose Egg Heaven in a search result page and click their company name to enter their profile.
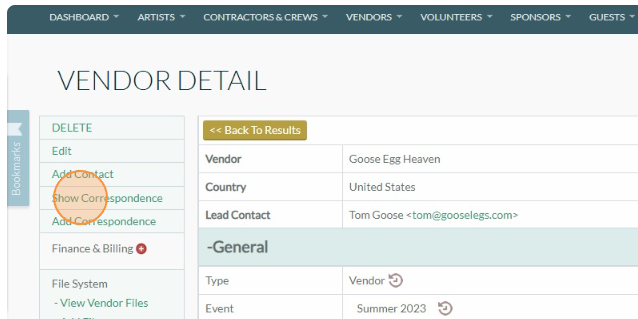
- Click Show Correspondence, This will show you all the mails sent to this contact within the system
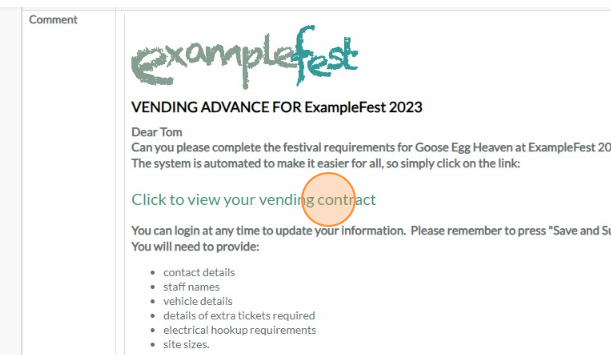
Click the little + next to the date of the bulk mailing we just sent to see the email

- Here you can read the email sent to them with the exact information from their profile fields rather than the mail merge. You can also then click on the link in the email, to access their autologin link and see the form as if you were them. You will note if you click this through the site fee's we set earlier and they are limited to entering 3 names in the accreditation area for tickets. Viewing a form like this is essentially allowing you to fill it in on their behalf, so do not submit in the case you don't want to complete the form for them.
Conclusion: By completing these tasks, we have efficiently managed the vendor aspect of the festival. We have added vendors via CSV upload, categorized them based on a custom field, set vendor fees, accredited them, and sent out vendor contracts. This systematic approach ensures a smooth and organized process for onboarding vendors, contributing to the overall success of the "Bites & Vines" food and wine festival.


 icon to drag this field up above Agreed Site Fee, so it's easier to find later.


