- Print
- DarkLight
After following along with these tasks, please complete the accompanying lesson questions on Get To Know Lesson 3 form in your system.
In this lesson we will start by using a volunteer application form to collect information from individuals interested in volunteering for the "Bites & Vines" food and wine festival. We will edit parts of this form and learn how to share the form with others. Then we will have to review and approve applicants we wish to have come work for us. The Bites & Vines festival runs with the support of an excellent stewarding team and we will need to create some shifts for them to work, rota our staff on and send the staff their expected shifts.
1. Volunteer Application Form:
Let's begin by creating a comprehensive volunteer application form. This form should capture essential details from potential volunteers, including their name, contact information, availability, skills, and any preferences they may have regarding their tasks during the festival. Don't worry though, if your working in a new system, we have a default form we can work from with all of this already setup, but let's add a new question, a checkbox asking if they prefer yellow or blue high-vis jackets.
- The first thing we need to do is to locate the default Volunteer Application form. You can find it under the Dashboard menu and Forms. This is where all your system forms can be found.
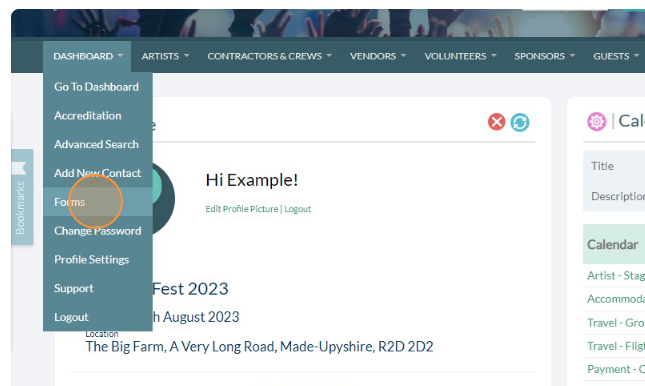
- Locate the volunteer application form and click on the form settings
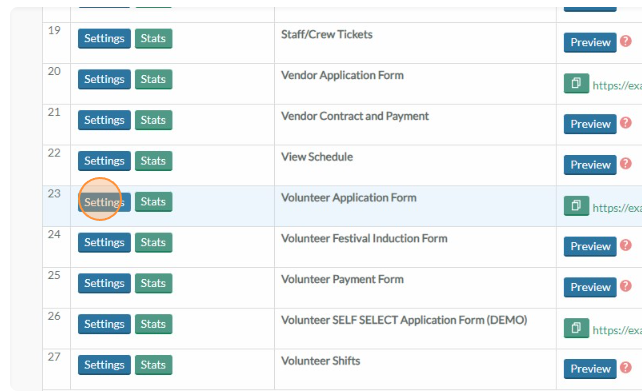
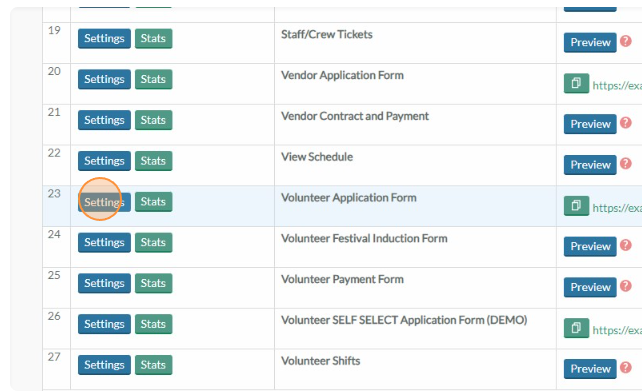
- This form is neatly setup with a lot of useful questions, you could easily edit, delete and move current fields. But for now let's leave the defaults as they are and instead add a new question. Scroll to the bottom and click Add New Field.
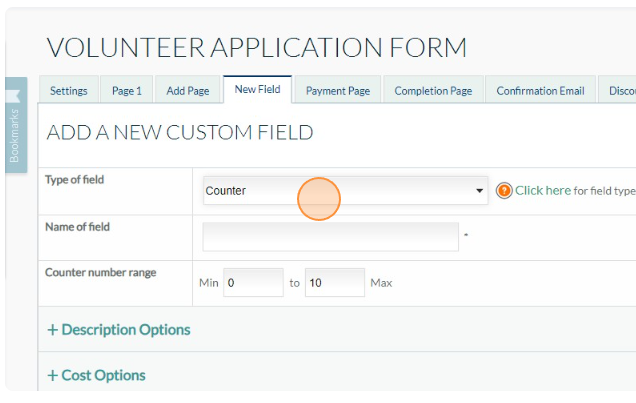
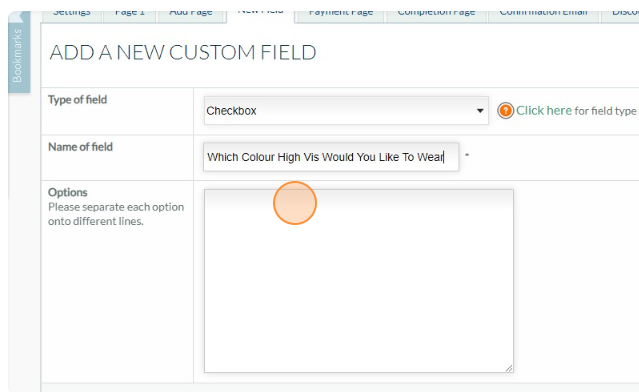
- Click this dropdown and choose Checkbox, name the field "Which Colour High Vis Would You Like To Wear"
- In the options box add in options for Yellow, Blue and Both. Each on a new line of it's own. Then choose Save.
You will now see this question on your form, use the drag and drop arrows to move the question up from the bottom to above the choose role description field using the 'burger arrow' icon .

- Click save and we are now ready to send this form out. Application forms are usually set to be a public form. Public forms will create a new contact record on completion. They also have URLs that can be given out for people to access the form.
2. Sending out the form and creating a test contact.
Let's locate the URL for our volunteer form and fill it in to see how it will look for your applicants, this will also create a test contact for us to schedule onto a shift at our Bites and Vines festival. Let's locate the form again by going back to the dashboard list of forms.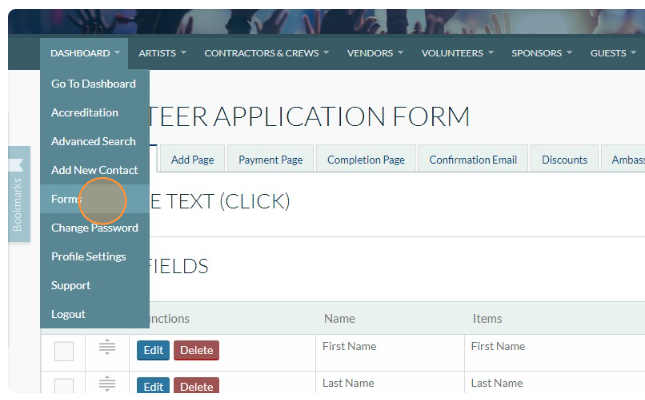
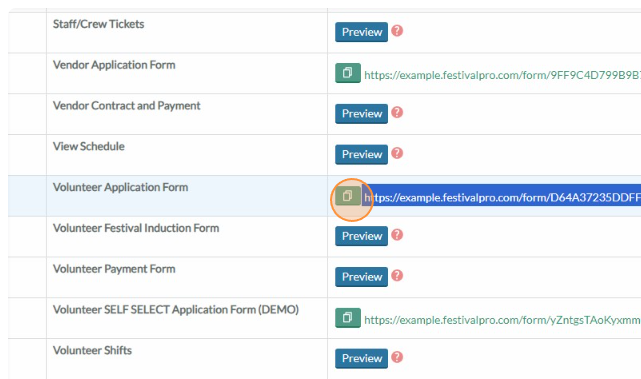
- Locate the Volunteer Application Form that we were just editing, You can click the copy icon button or highlight the text.
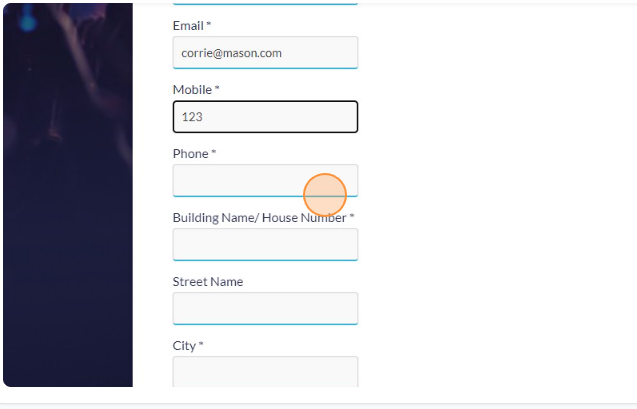
- Visit the form URL in your browser and let's fill in the form to create a new registration that we will use as an example. Create a contact with the name 'Corrie Mason' and the email address 'corrie@mason.com'. You can make up details for the remainder of the required fields. But please fill in Yellow in the new high-vis question we asked earlier.

Our default form asks for a deposit so when you try to submit the form you should find it takes you to a stripe payment page to pay the deposit off. If you do not use deposits for your event then this field can in future be deleted. But for now, it's a useful opportunity to show you how to manually mark a contact on a payment form as paid. You might do this if someone pays via invoice rather than stripe, or perhaps pays you in cash.

- Let's return to our registrations list for the Volunteer Application form.
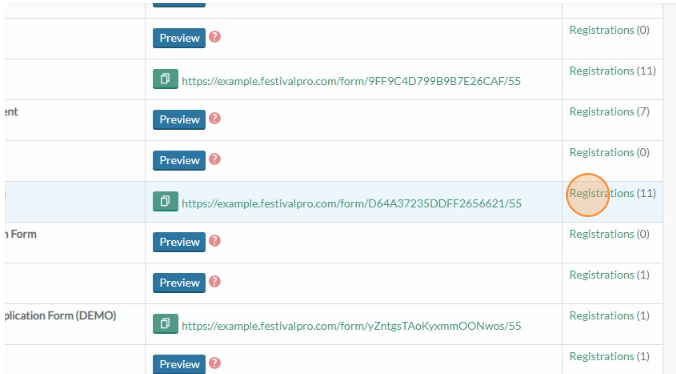
Click the Unpaid Tab to see registrants who have not paid.

Next you can click Paid on Corries application to mark her deposit as paid.

- In in the payment popup you should choose the method of payment then hit confirm payment. I'm going to choose Gold Bullion.
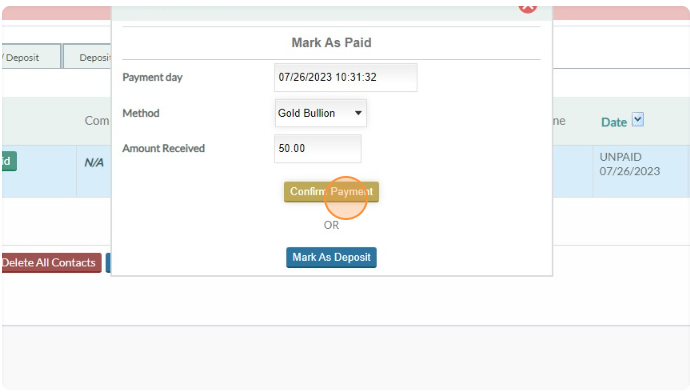
- Excellent, we have now successfully edited the application form and completed it as an applicant. As well as manually marking their deposit as paid. Before we review our applicant and accept Corrie Mason, let's extend the opening dates on the form to allow applicants to keep applying. It is useful to be aware of where this is, as if the date passes your form will close.
- Click into the form settings for the volunteer application form.

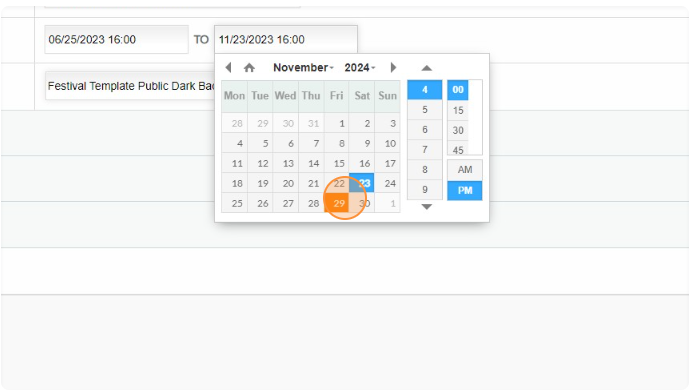
- You should notice the registrations open between date fields, let's just set the ending date forward by a few months, or closer to your event date. Then the save button.

3. Review and Approve Applicants:
Once applications start coming in, we can review and assess each applicant based on their form answers, which is why questions such as availability, skills, and preferences are important. Consider how well their abilities match the available volunteer roles. Approve suitable applicants using the following process.
- Go to your dashboard -> forms list and goto the registrations on the volunteer application form.
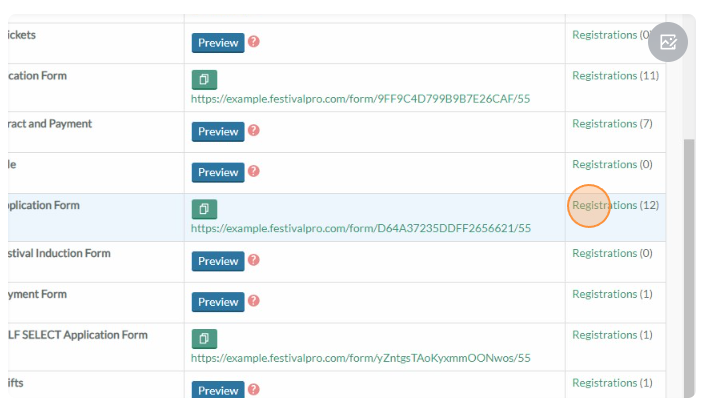
- You can review Corrie Mason's form entry information by either clicking the view button or using the Add Columns feature to view certain answers directly on the registration screen. Try both.


- Once you have reviewed somebodies application you can confirm them as a volunteer by clicking the Monitor icon at the end of their registration entry to get the popup, clicking the confirm volunteer button and hitting save.
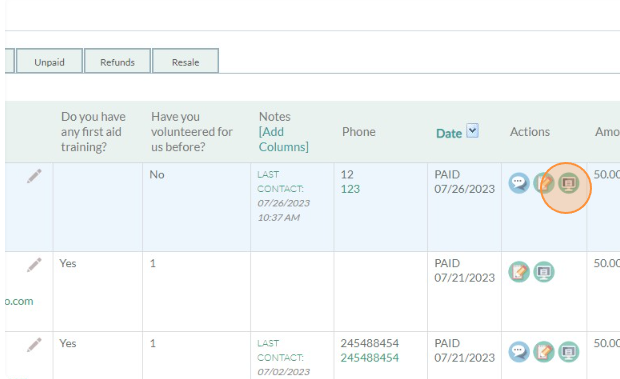
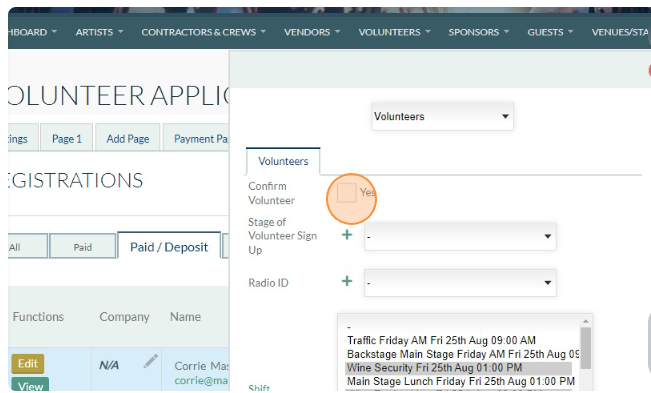


- And that's it, you have confirmed Corrie as a volunteer and she will show up now in the menu under Volunteers -> View All Confirmed .
4. Creating Shifts
Dividing the festival days into shifts helps to ensure smooth operations and appropriate coverage. Each shift should have a defined start and end time, location and a required staffing level. We can create shifts either in a list format, or in calendar view. We will add in two shifts for our festival, one each way.
- Firstly let's create a shift for some 'Wine Security' in our Big Top, between 1pm-2pm on the Friday of our event. Go to the volunteers menu and choose volunteer shifts.
- At the bottom of the page will be a + icon with Add Another next to it, click this to create a new box in which to enter a shift.
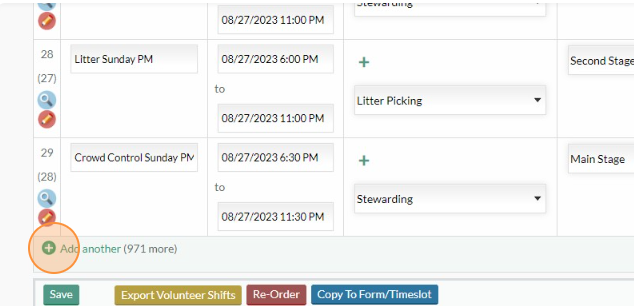
- Create the Wine Security Shift on the Friday between 1pm-2pm, with the stewarding role, in the main stage, requiring one lucky person. Then click Save.
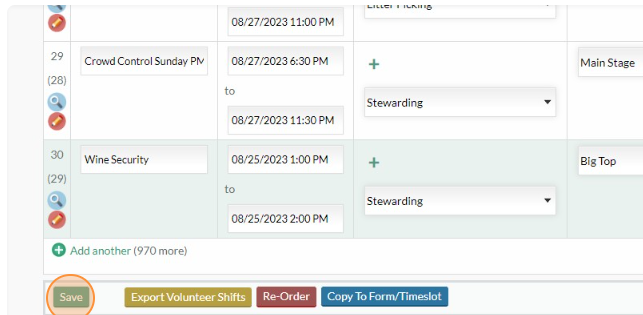
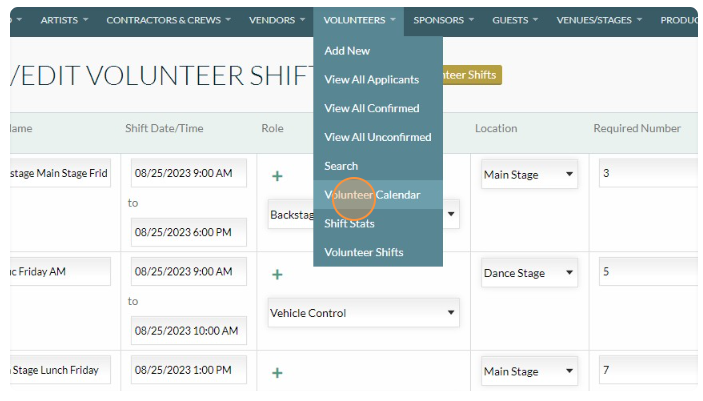
- Simple as that. Now let's create a shift on the volunteer calendar. Navigate there via the menu
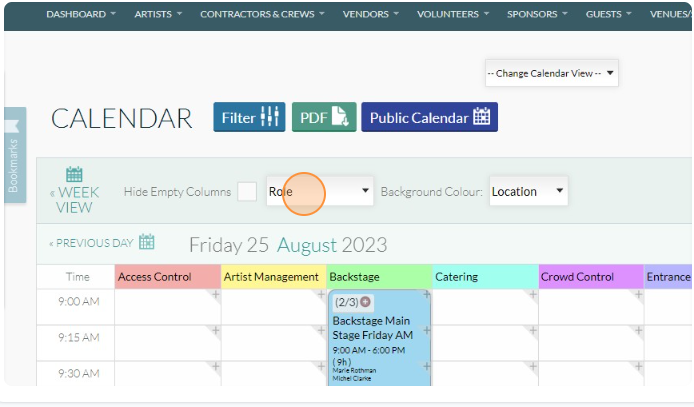
- Click into the Friday to see day view and you will see the that the calendar will display by role as default, calendard allows you to pivot views according to that calendars data points (for example later on you will find a ground transport calendar you can pivot between drives, vehicles and routes) - Let's click on Role and pivot to location.
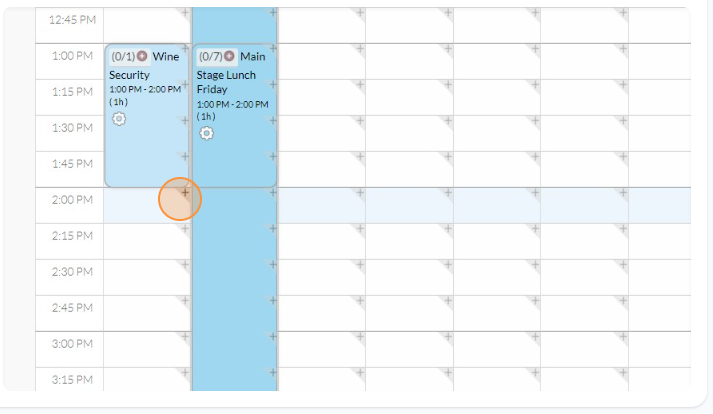
- Now we can see all the shifts that are available displayed in their different venues, let's add a shift on the big top. If you scroll down you should see the Wine Security shift we created earlier. We are now going to create a shift just after it. So click the + icon to create the new shift. This one will be 'Wine Tasting Host'.
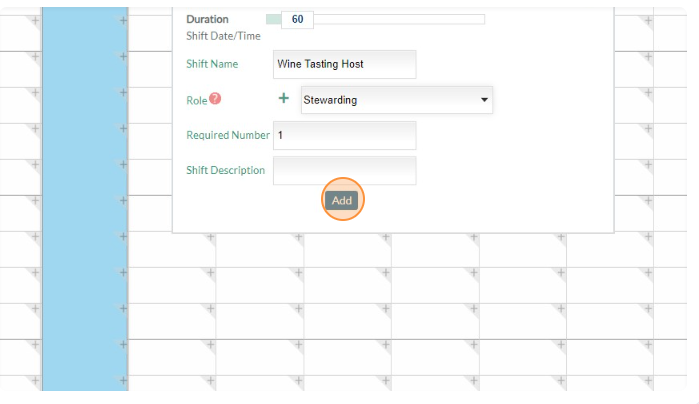
- We will be needing one person on this stewarding shift. Create the shift.
5. Add Person to Shift:
After approving an applicant and creating shifts, we need to assign our volunteers to a specific shift based on their availability and preferences. Ensuring that each task is adequately staffed.
Let's give our volunteer Corrie Mason something to do. The best wine tasters are also great wine security. Let's add Corrie to these shifts.
Click the + icon on the top of the shift box
- Click Add More

- Type 'Corrie' into the search box and hit search

- Select our Corrie Mason from the dropdown and click Add. You can then exit this box with the X in the top corner.
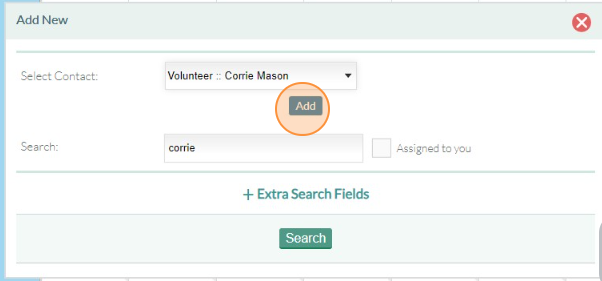
- You will now see that shift is 1/1 on your calendar and her name will appear small in the box. You may need to refresh on some browsers to see the change. Next let's add her to the following shift, the wine taster host shift and see what happens. This time we will search for people who have a yellow high-vis jacket preference. You may remember setting this earlier in the lesson.
- Click the + icon on the Wine Tasting Host Shift andthen click Add More, as before.
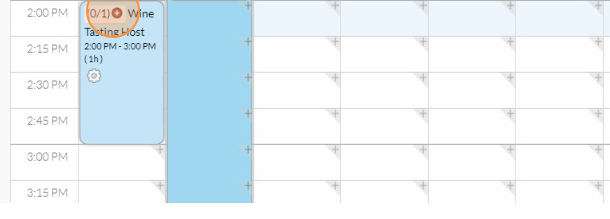
- Instead of typing out the name click Extra Search Fields.
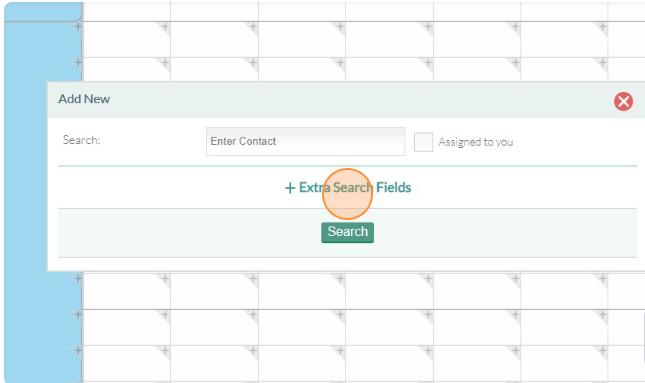
- Scroll down to look for the question about high vis and let's find all the people who said yes to yellow. Which at this point should just be Corrie. Select yellow then hit the search button.
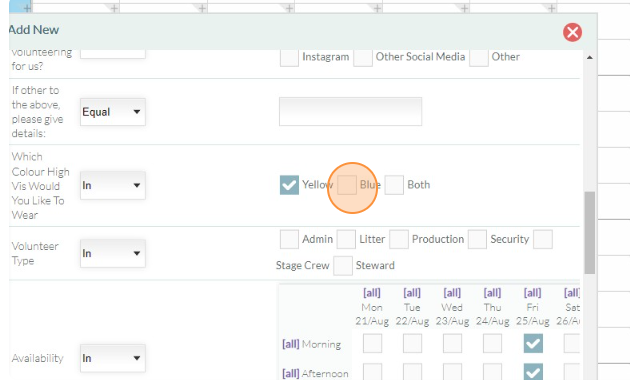
- You will notice when you locate Corrie on the dropdown she will be marked as a 'Conflict' - This is because she has a shift within 30mins of the one we are putting her on. The clash overlap can be adjusted later, but this feature will help you avoid double scheduling somebody. You are able to schedule them despite the conflict, so let's add corrie to this shift too.
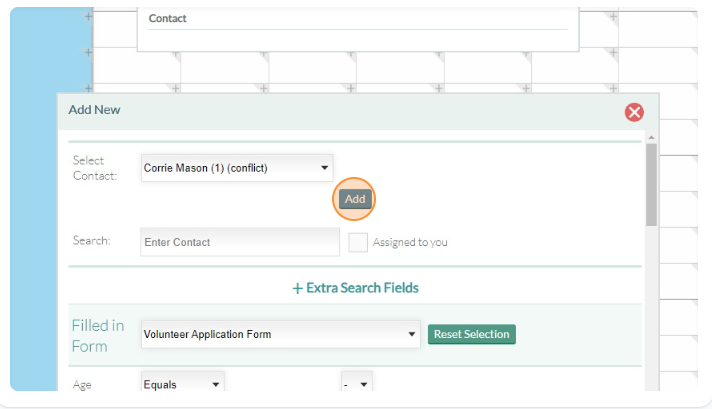
- Congratuations, you've successfully created and scheduled two shifts. All that remain is to email Corrie her shifts. You can always use the Volunteer Menu -> Shift Stats page to see how full/empty your shifts are at a glance.
6. Email Shift Information:
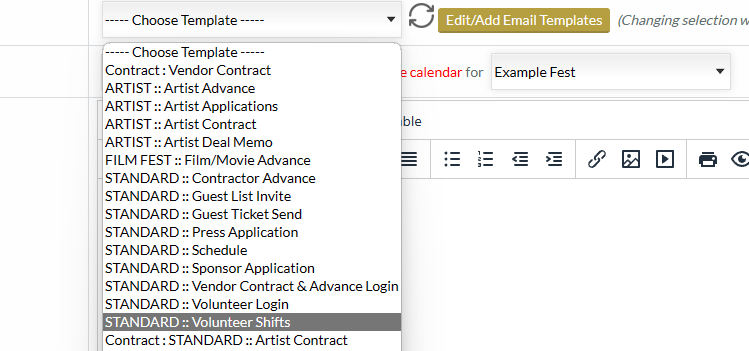
We can send an email to each volunteer who has been assigned to a shift. The email will include the shift date, time, location, and any relevant instructions. We have a template pre-setup called Volunteer Shifts. You can edit the templates at a later date to include extra information specific to your event.
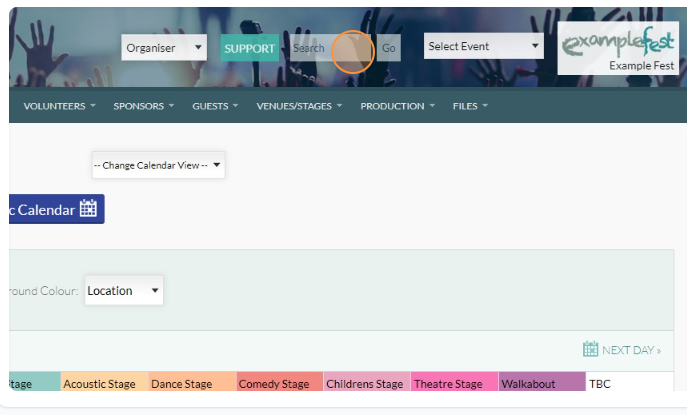
- Click into the top search bar and search for Corrie
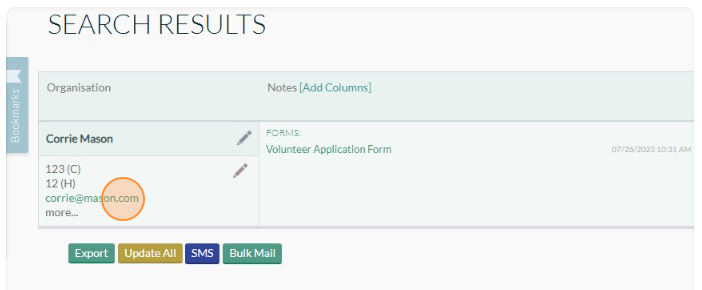
- Click on the email address next to her name
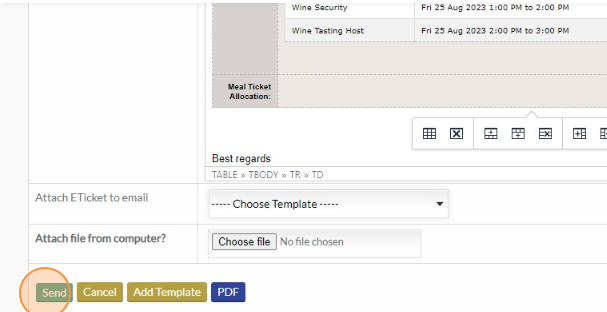
- Choose the Volunteer Shifts email template
- Finally click send to email Corrie her shifts.
- Congratulations. That's this lesson complete. The festival now has a procedure to take volunteer applications, review them, create shifts , schedule staff and send them all of their shifts.
Conclusion:
By following this lesson plan, you can now effectively manage volunteer shifts for the "Bites & Vines" festival. The volunteer application form and edit option allow for efficient recruitment and communication with potential volunteers. Reviewing and approving applicants based on their qualifications ensures the right fit for each task. Creating shifts and adding volunteers to them ensures proper event coverage, and emailing shift information keeps everyone informed and prepared for their roles during the festival. With well-organized volunteer management, the festival is set to be a successful and enjoyable experience for all attendees.


